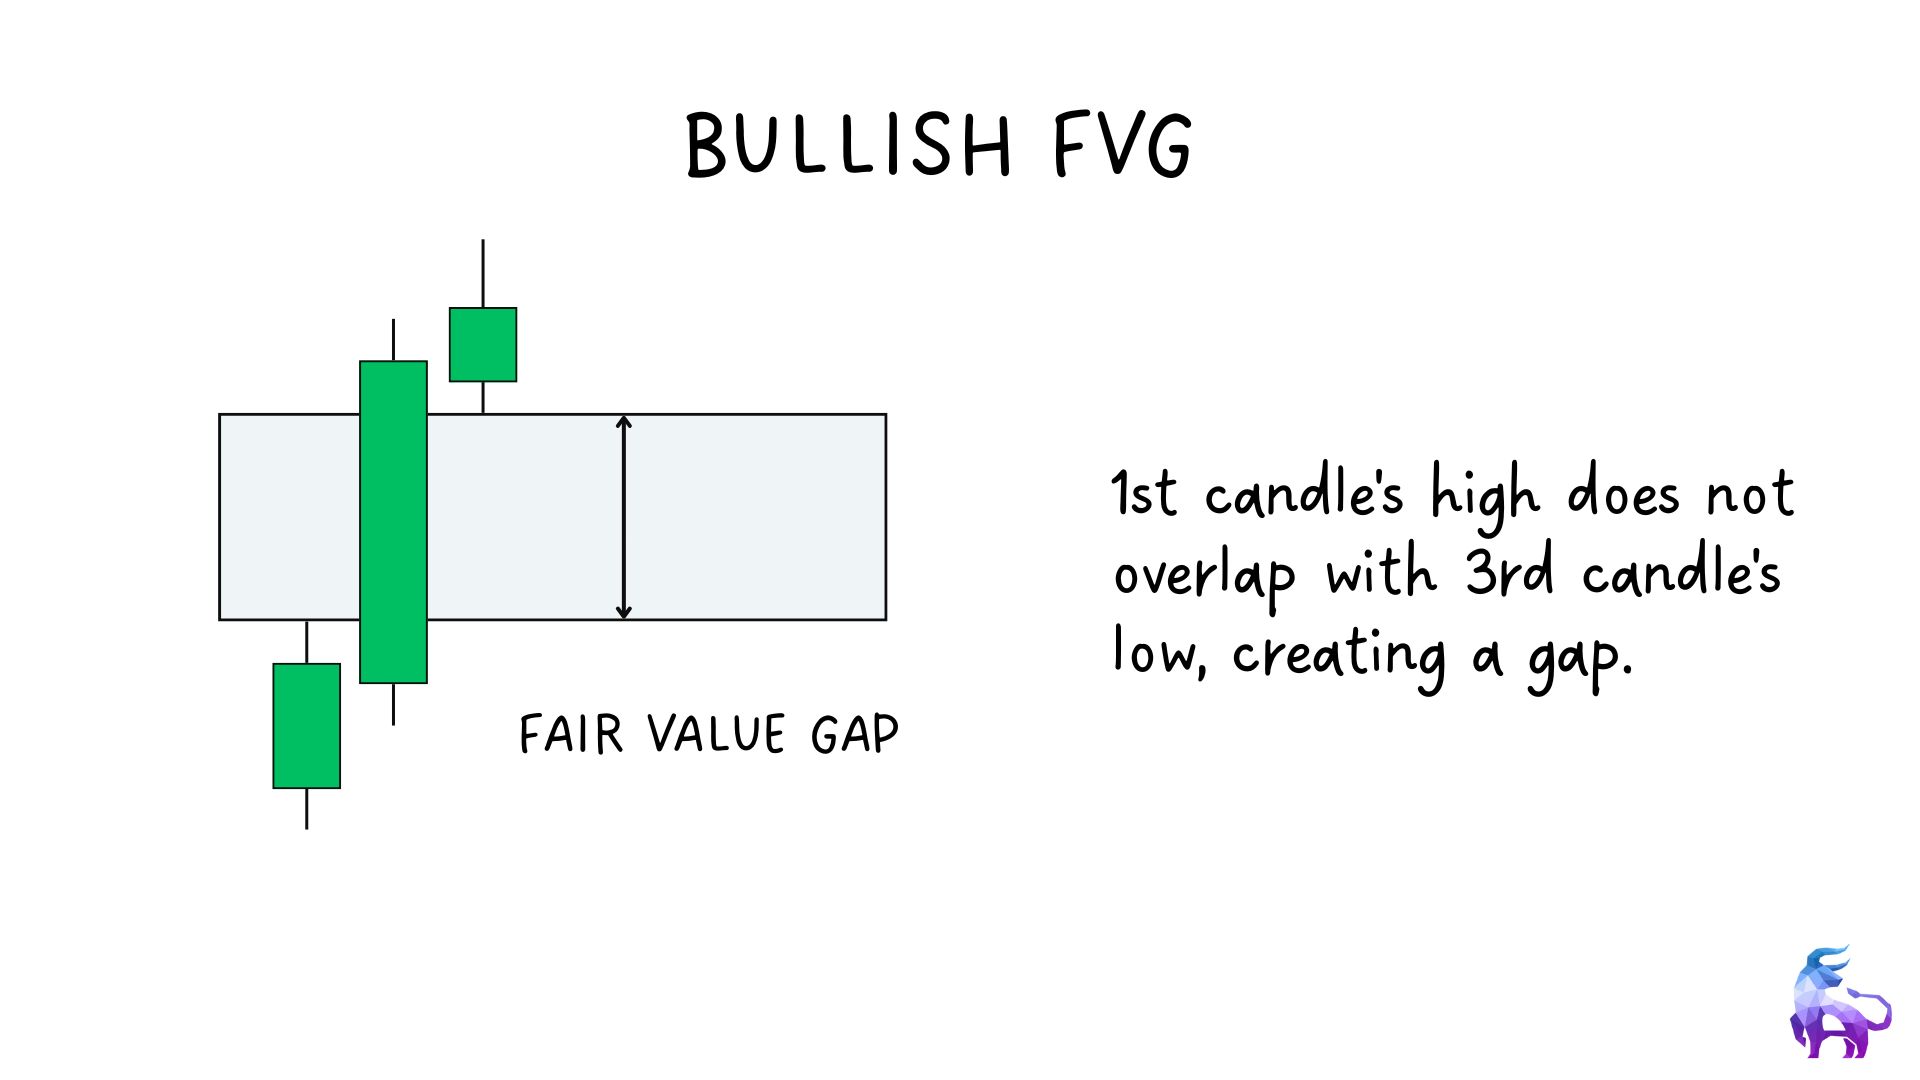
Fair Value Gap
A Fair Value Gap (FVG) is a price imbalance on the chart. In simple terms, it’s an area where the price moved too fast in one direction and didn’t fully trade at all levels. ICT traders believe smart money often comes back to these areas later to rebalance price or enter new positions.
How Does a Fair Value Gap Form?
A Fair Value Gap forms when price creates a three-candle pattern with a gap between the first and third candles.
Here’s what to look for:
A bullish FVG forms when:
- If the high of the first candle does not overlap with the low of the third candle.
- There’s a gap between them.
- That gap = bullish fair value gap.
This means the price moved up so fast that it skipped over the price in between.
A bearish FVG forms when:
- If the low of the first candle does not overlap with the high of the third candle.
- That gap = bearish fair value gap.
This shows that the price dropped quickly and left unfilled space behind.

How to Spot a Valid FVG vs. a Non-FVG
If there’s no overlap between the wicks = valid FVG.
If the shadows do overlap = no FVG (market fills that price area).

How Price Reacts to a Bullish Fair Value Gap
When price returns to a bullish FVG, ICT traders look for two main reactions to confirm that the gap is being respected.
The first reaction is when price drops into the gap, touches or pierces the top of the FVG, and then closes above it. This shows that buyers are still active in that zone, and the price is likely to continue upward. This is considered a clean reaction to the upper boundary of the gap.
The second reaction traders look for is at the midpoint of the FVG, which is called the consequent encroachment. If price pierces into the FVG, reaches the midpoint, and then closes above it, that is another sign that the gap is being respected. Sometimes, price will test the midpoint more than once before moving higher.

Both of these reactions suggest that smart money may be using the FVG area to enter or reload long positions.
How Price Reacts to a Bearish Fair Value Gap
When price returns to a bearish Fair Value Gap (FVG), there are similar reactions that ICT traders look for to confirm that the gap is being respected.
The first reaction is when the price rises into the FVG, touches or pierces the lower boundary of the gap, and then closes below it. This suggests that sellers are stepping in at that level, and the price is likely to continue moving downward. This is a clean rejection from the lower edge of the gap.
The second reaction is at the midpoint of the FVG, also known as consequent encroachment. If price enters the gap, reaches the midpoint, and then closes below it, this is also seen as a valid reaction. In some cases, price might test the midpoint more than once before dropping.

These reactions show that smart money could be using the gap area to build or add to short positions.
Theory Behind Fair Value Gaps (FVGs)
At its core, the theory behind Fair Value Gaps is based on price imbalance and institutional order flow.
When large players (like institutions or algorithms) aggressively buy or sell, they often move price so fast that the market doesn’t have time to fill in the other side of the order — this creates an inefficiency or “gap” in price where no trades occurred. This unfilled space between candles is what we call a Fair Value Gap.
Why It Forms:
- Too much buying/selling pressure
- Not enough counter orders (no liquidity on the other side)
- The result is a fast move that leaves a price void
Why It Matters:
The market is designed to seek efficiency. It tends to:
- Revisit and fill these gaps
- Rebalance price before continuing its trend
That’s why price often returns to FVGs — to fill in the orders that got skipped the first time. These returns give traders a second chance to enter with the smart money.
Institutional Behavior:
Most retail traders chase breakouts. Institutions, on the other hand:
- Create the breakout (cause the FVG)
- Wait for the retrace into the gap
- Re-enter at a better price
Understanding this helps you align with how real money moves, not just surface-level patterns.
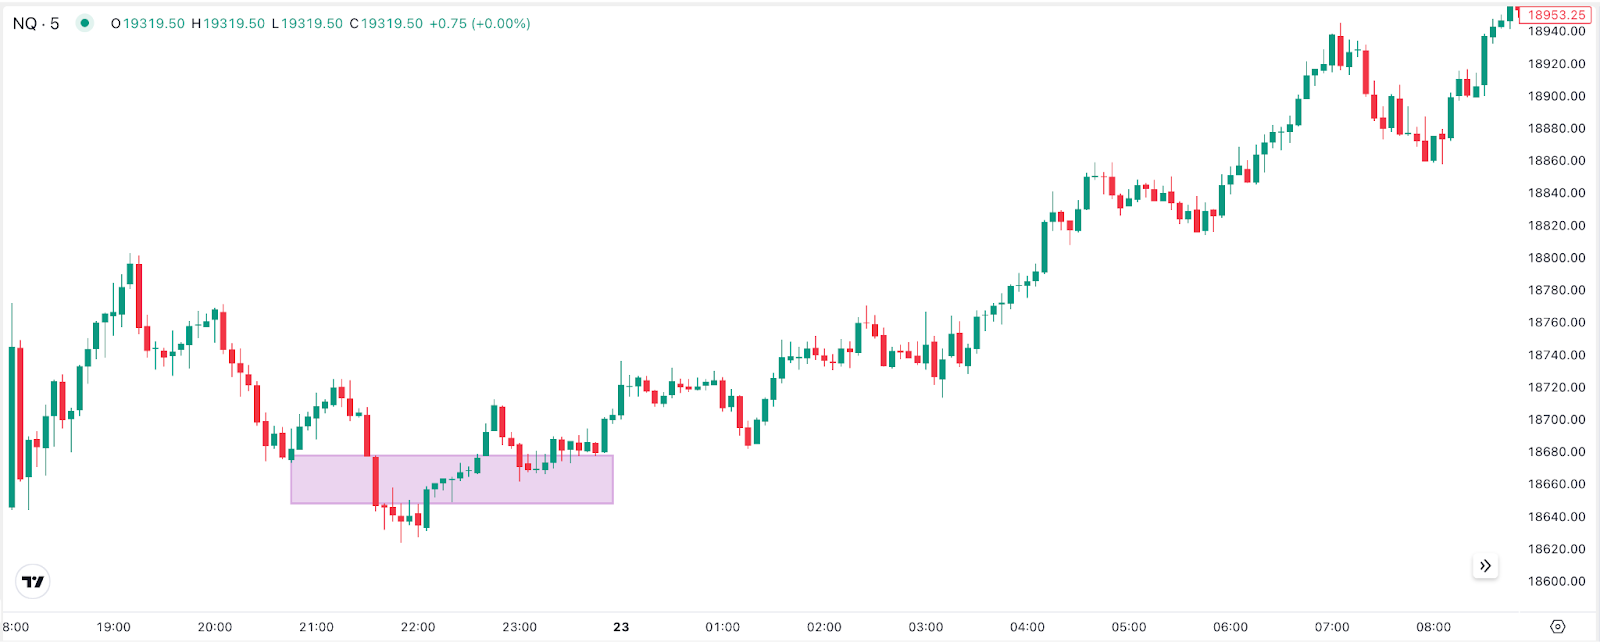
Here is an example of FVG on chart

Fair Value Gap Inversion
Sometimes, price doesn’t respect a Fair Value Gap (FVG) the way we expect. Instead of bouncing or rejecting from the FVG, the price breaks straight through it. But that doesn’t mean the zone is no longer helpful.
In ICT, when price breaks through a FVG and comes back from the other side, it’s called a Fair Value Gap Inversion.
It works just like a support/resistance flip — a level that once acted as support may now act as resistance, and vice versa.
Bullish IFVG
A bullish IFVG forms when a bearish FVG is invalidated.
Here’s how it works:
First, a bearish FVG is created during a downward move.
Later, price breaks through the bearish FVG — either by a wick or a full candle close above the zone.
This tells us that the bearish imbalance has failed.
Now, that same area is treated as a bullish IFVG — a zone where buyers took control.
Once this bullish IFVG is formed, ICT traders wait for the price to retest the zone from above. If price respects the zone and shows bullish signs, it becomes a valid area for long entries.

But if a price drops below the bottom of the IFVG, it is considered invalid.
Bearish IFVG
A bearish IFVG forms when a bullish FVG is invalidated.
Here’s what happens:
First, a bullish FVG forms during an upward move.
Then, price breaks below the bullish FVG, either with a wick or full candle close under it.
This shows that the bullish imbalance has failed.
That zone now becomes a bearish IFVG — a new area of sell-side imbalance.
When price comes back to retest the bearish IFVG from below, and shows rejection, ICT traders may look for short trades from that zone.

If the price rises above the top of the IFVG, the level is considered invalid.
Here is an example of IFVG on chart
Order Block
An Order Block is a price area on a chart where large buying or selling activity took place, usually by institutions or smart money. These areas often lead to strong moves in price and can act as support or resistance when the price returns to them.
Order blocks are used by SMC (Smart Money Concept) and ICT (Inner Circle Trader) traders to spot where the big players entered the market. When price revisits these areas, it often reacts again, making them useful for trade entries.
Bullish Order Block
A bullish order block is the last bearish candle before a strong upward move.
It shows where smart money placed buy orders and pushed the price higher.
Acts as a support zone.
Bearish Order Block
A bearish order block is the last bullish candle before a strong downward move.
It shows where smart money placed sell orders and drove the price lower.
Acts as a resistance zone.

Psychology Behind Order Blocks
The idea behind using order blocks as potential reversal zones is based on the belief that they often form just before a significant market move. These zones are thought to be areas of manipulation, where smart money enters the market after sweeping liquidity.
Traders see these zones as key points where a large number of buy or sell orders have already been executed. Because of this, when the price returns to these areas, there’s a high probability of a reaction or reversal.
By including order blocks in your trading strategy, you can take advantage of these potential turning points in the market.
Identify Valid vs Invalid Order Block
Order blocks are important tools for identifying areas where strong buying or selling took place. They can offer high-probability trade setups when used correctly. However, not every candle that looks like an order block is actually valid. Just because a candle appears before a big move doesn’t automatically make it an order block.
To avoid false setups, it’s important to know what truly defines a valid order block and what to ignore.
Criteria for a Valid Order Block
Not every candle before a big move is a valid order block. To filter out weak setups, there are four key rules you should follow. A valid order block must meet all of these conditions.
Liquidity Sweep
The order block candle must take out the high or low of the candle that came before it.
- In a bullish setup, the bearish candle should break below the previous candle’s low.
- In a bearish setup, the bullish candle should break above the previous candle’s high.
This shows that the market grabbed liquidity — stop-losses were triggered, or traders were trapped before the reversal. Without this sweep, the candle lacks the manipulation that smart money usually creates before entering.
Let’s take a look at this bullish scenario.
On the left, price moves down and forms a valid order block by sweeping the low of the previous candle before reversing upward. This sweep of liquidity confirms manipulation before the shift in direction, making the last bearish candle a valid bullish order block.
On the right, price also moves down, but the last bearish candle does not take out the previous candle’s low. Since there’s no liquidity sweep, this candle does not qualify as a valid order block, even though the price still moves higher afterward.

Imbalance (Price Inefficiency)
After the order block forms, the price should move away quickly, leaving behind an imbalance. This happens when there’s a gap between the candles, meaning the wicks don’t overlap.
This imbalance shows urgency and strength in the move. It confirms that large orders were involved and that the price moved too fast for regular buyers or sellers to fill.
If there’s no imbalance, the move may be weak, and the order block is not considered valid.
Look at the example below for a bullish scenario. On the left, the order block is valid because the subsequent candles leave a clear gap, meaning there’s an imbalance — price moved quickly, leaving unfilled orders behind. This shows strong momentum.
On the right, the order block is invalid because the subsequent candles overlap, meaning no imbalance was left. The move was balanced and not driven by urgency.

The same rule applies to bearish setups. A valid bearish order block must be followed by candles that leave a gap. If there’s no gap, the order block is not considered valid.
Unmitigated Zone
A valid order block must stay untouched (unmitigated) after the move. If the price immediately returns and trades into the zone, it’s an invalid order block.

Order blocks are typically used once, the first time the price returns to the zone. After that, the level becomes less reliable.
Break of Structure or Change in Direction
The move following the order block must break a key structure level.
- In a bullish case, the price should break a recent swing high.
- In a bearish case, the price should break a recent swing low.
This confirms that the market didn’t just pause — it actually changed direction. If there’s no structure break, the move lacks confirmation, and the order block may not hold.
Now let’s take a look at an example.
In the image, we can see two valid bullish order blocks, each followed by a strong move upward. After each order block, the price creates a visible imbalance (gap) and then breaks above a recent swing high. This is what we call a Break of Structure (BOS).
The BOS confirms that price didn’t just bounce temporarily — it actually shifted direction and continued higher. When this structure break happens after an order block, it adds strong confirmation that the level was valid and backed by real momentum.

Breaker Block
A breaker block is a price zone that was originally an order block, but it failed to hold, leading to a shift in market direction. Once the price breaks through a valid order block, that zone can flip, turning a previous demand zone into supply, or a prior supply zone into demand. This new flipped zone is what we call a breaker block.
- A bullish breaker block comes from a failed bearish order block that the price breaks above, then uses as support.
- A bearish breaker block comes from a failed bullish order block that price breaks below, then retests as resistance.

Psychology Behind Breaker Blocks
Let’s say price forms a bullish order block and moves higher, breaking structure. But later, price reverses and breaks below that order block, changing the trend. Now, that demand zone has failed and has turned into a supply zone — this is now a bearish breaker block.
When price comes back up to retest this area, it often rejects and continues downward, because:
- Buyers from the failed OB are trying to exit at breakeven.
- Sellers see it as a new short opportunity.
- It aligns with a shift in market structure

This same concept applies in reverse for bullish breaker blocks.
Identify Valid vs Invalid Breaker Block
Breaker blocks can be effective when used the right way. They help highlight possible reversal zones after price breaks through a previous order block. But just like with order blocks, not every broken level is a valid breaker block.
Sometimes price breaks through a zone, but it doesn’t meet the conditions that confirm a real change in direction. Other times, the retest happens without a strong reaction. These setups are less reliable and are better left alone.
That’s why it’s important to understand what makes a breaker block valid — and how to spot the ones that don’t meet the mark.
Criteria for a Valid Breaker Block
Not every break of an order block creates a valid breaker block. There are specific rules that must be in place to confirm whether a breaker block is something you should pay attention to.
Here are the key criteria to look for:
Liquidity Must Be Cleared First
Before a breaker block forms, price should take out a key high or low, clearing buy-side or sell-side liquidity. This sweep is an important sign that the market is grabbing stop orders and setting up for a shift.

Price must create HH and LL
After liquidity is taken, the price should show a clear change in direction. In a bullish case, this means forming a higher high. In a bearish case, it means creating a lower low. This rules out small, random moves — and confirms that momentum has shifted.

Price Must Start Reversing
Once the liquidity is cleared and a new high or low is formed, the price should begin to pull back toward the previous zone. This starts the setup for the breaker block retest.
Full Body Break is Required
For a breaker block to be valid, the price must break and close through the original order block, not just wick through it. The body of the candle must clearly close beyond the zone to confirm that it has failed.

One-Time Use Only
Breaker blocks are only considered valid the first time the price returns to them. Once the area is mitigated, it loses its strength and should not be used again for future trades.
Volume Imbalance (VI)
A Volume Imbalance happens when there’s a visible gap between the body of one candle and the body of the next.
In simple terms, it means that the close of one candle does not overlap with the open of the next candle. Even if the wicks do touch, the body gap still shows that the price moved too quickly from one level to another, skipping over certain prices.

This imbalance is caused by uneven order flow, usually due to strong buying or selling pressure.
These gaps often act as temporary support or resistance zones, especially when the price comes back to them later.
Gap
A Gap is more aggressive than a volume imbalance.
A gap forms when there is no overlap at all, not in the body and not even in the wicks. That means there was zero trading activity between the two candles.
This usually happens after strong news, overnight sessions, or a sudden breakout where the price jumps to a new level without trading at in-between prices.
In a gap:
- The high of one candle is below the low of the next (bullish gap).
- Or the low of one candle is above the high of the next (bearish gap).

This creates a blank space on the chart — as shown in the image — which price often returns to later.
Key Takeaways
- FairValue Gap (FVG): A price gap between candles caused by fast moves. Price often returns to this zone before continuing..
- FVG Inversion: If price breaks through a FVG, the same zone can flip its role (support becomes resistance, or vice versa).
- Order Block: The last up or down candle before a strong move. Acts as a key zone where institutions placed large trades.
- Valid Order Blocks must: sweep liquidity, create imbalance, stay untouched, and cause a structure break.
- Breaker Block: A failed order block that flips — now used as support or resistance. Needs liquidity sweep, structure shift, and body close.
- Volume Imbalance (VI): A gap between candle bodies (not wicks), showing urgency. May act as a support/resistance zone.
- Gap: A full price void — no overlap in bodies or wicks — often caused by news or volatility. Price tends to revisit it later.

.png)
.png)
